DIY BEAUTY LIGHTING

A couple of months ago I was on a plane watching "No Country For Old Men" for the first time. The audio was terrible through those headphones and the highly compressed, 4:3 image in front of me was pretty hard to watch...but, I was glued the whole time. I recently hired it and watched it again at home and enjoyed it even more. It's easily in my top 5 favorite films. Roger Deakins, the Coen Brothers and their amazing cast and crew have created a masterpiece! Whenever I watch films these days, it's actually difficult for me to switch off my analytical mind and just enjoy the story....cinema's help, but I'm always wondering..."how the heck did they light that?". The beauty of watching a DVD or Bluray is that often they come bundled with behind the scenes footage, which can sometimes give you a glimpse into the magic that goes into lighting a Hollywood feature film. "No Country for Old Men" has some great special features but sadly, there is ZERO content regarding Mr. Deakins and his work. There are however, some 2 second shots that reveal enough...if you look carefully and are quick with the pause button hehe :)

One thing I noticed, or at least think I have, is that many of the shots were lit with one MASSIVE soft light source (amongst other lights). I managed to pause the making of one shot (the hand-cuff strangle 00:45), and I saw what appeared to be a high intensity tungsten light behind thrown into a corner, which was then diffused by a huge bed sheet. The setup looked DIY but the results looked amazing...this got me thinking. The next day I drove to my local hardware store and purchased 2 x double 500w "workers lights". That equates to 1000Watts of light for $50. Pretty good deal! Next up I drove to the super-market and got 30meters of silver foil for $5. I then drove to a HiFi shop, parked out the back and went through their trash looking for a large flat box from an LCD TV....got one :) 

Behold....THE MOTHER REFLECTOR!!

20130309_144929.jpg
20130309_165123.jpg

"The Mother Reflector" is something I've been meaning to make for a while now....so awesome and so cheap. It even folds up to fit in the car! I'll be using this a lot, especially out doors. But anyway, for this experiment I was using it as my reflective  "wall" to bounce my worker's lights off. From there, even though the bounced light was already soft, I had to soften it even more and disperse its intensity. A bed sheet did the trick nicely :) ​

20130309_203534b.jpg

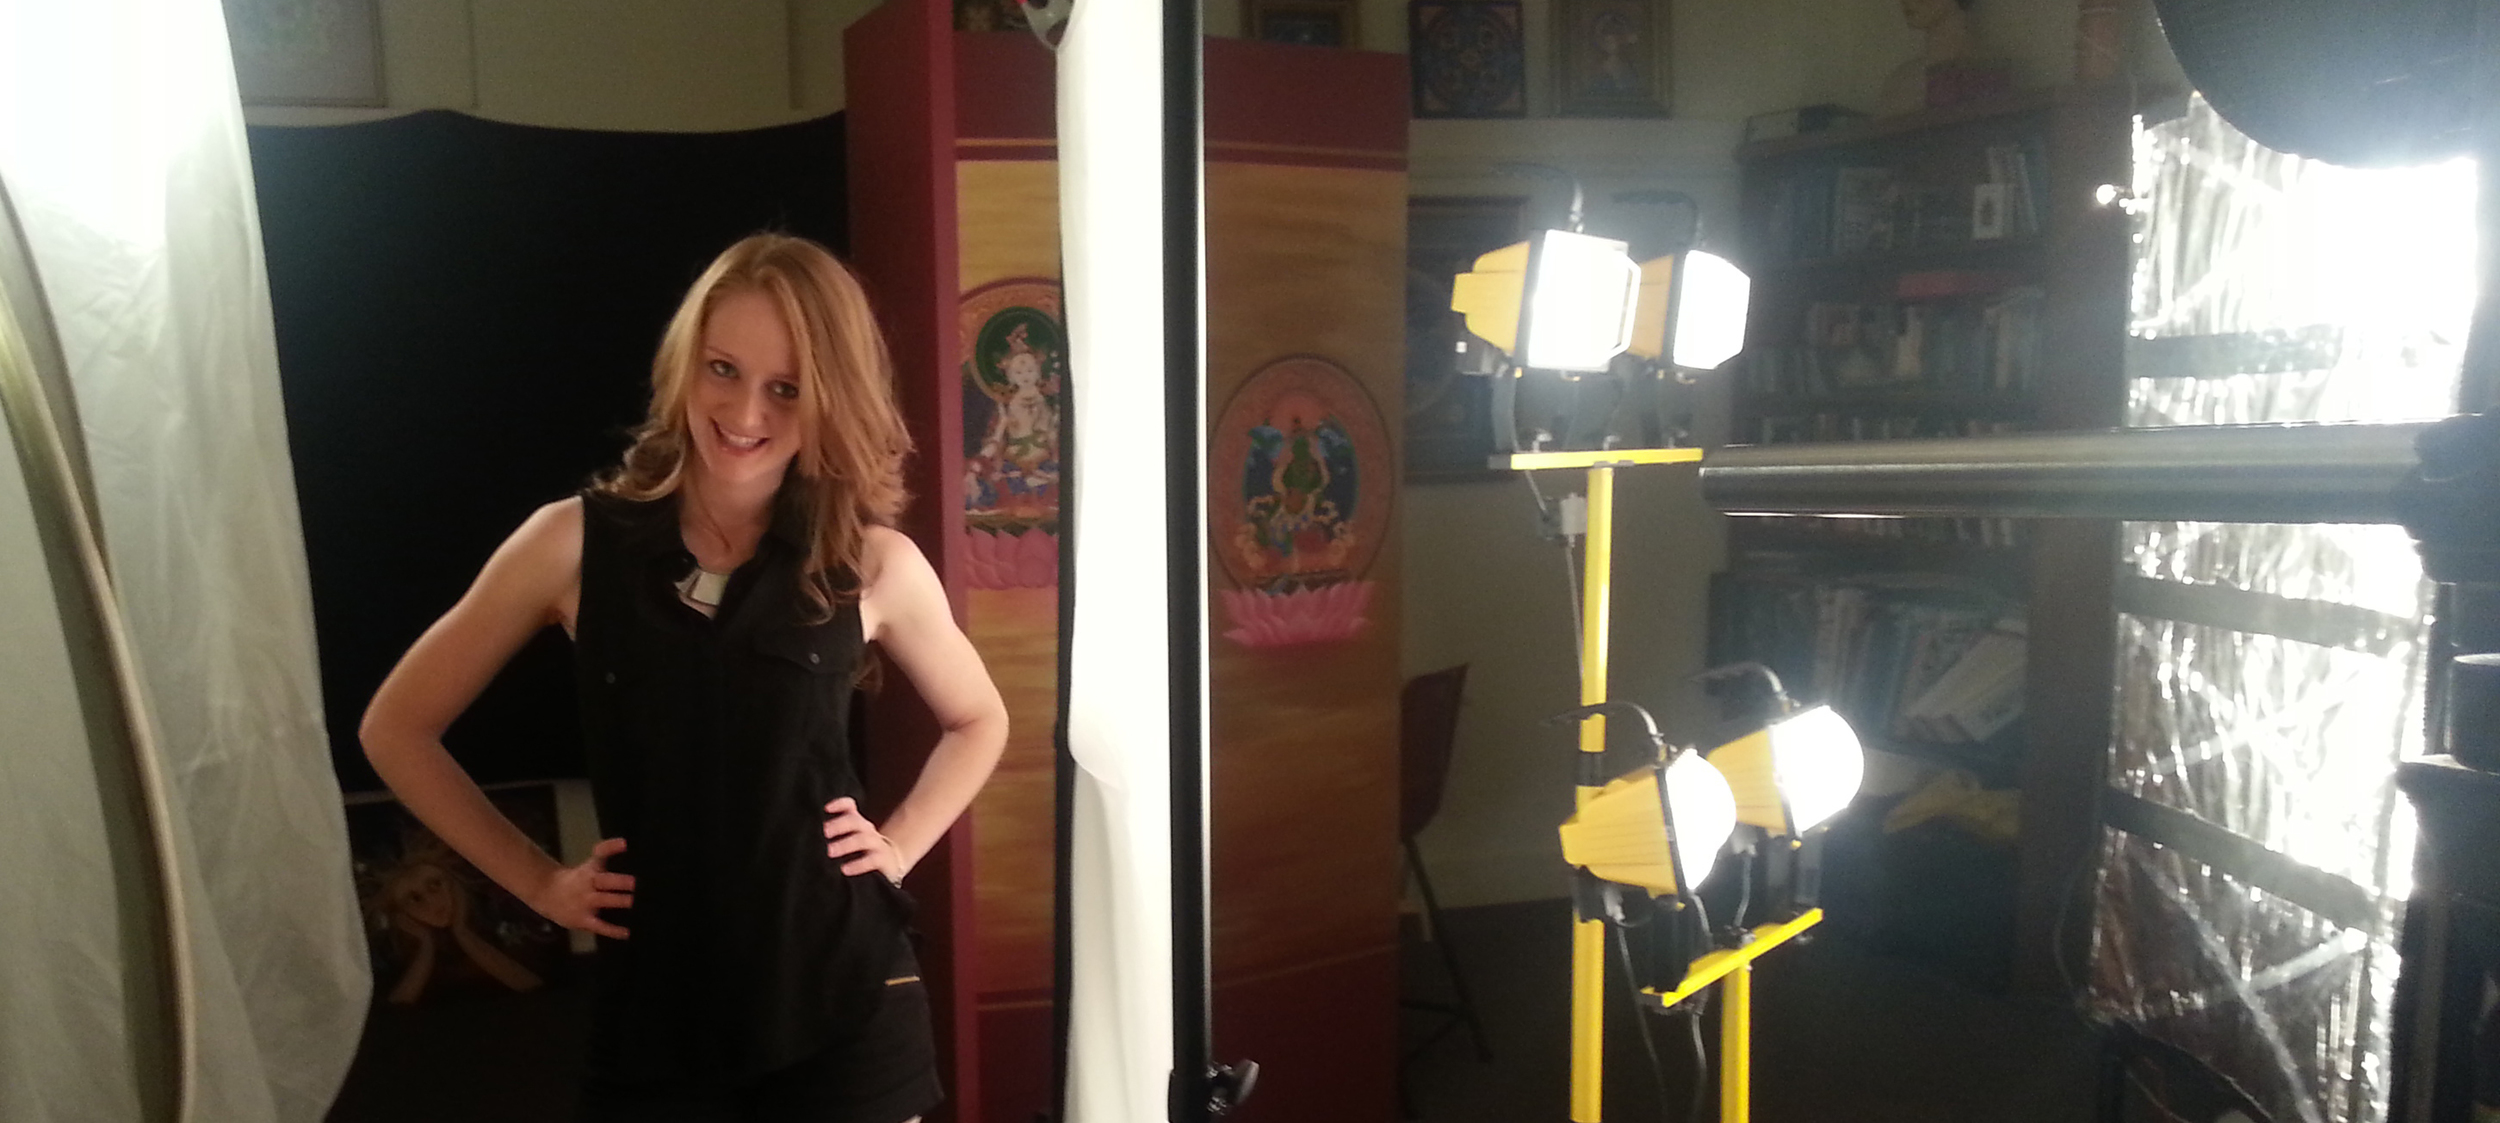
So, as you can see, my experiment looks NOTHING like No Country For Old Men hehe ;) But the idea of creating your own beauty light/massive soft source, is quite simple! A gentle back light slightly camera-left and some soft fill from a reflector on the same side to even out the face is all it took finish it off! The reflector also adds some nice catch lights for the eyes. See below for a detailed diagram :)

It's one thing to have ideas but it's another thing to have someone who is willing to participate and help you bring those ideas to life. My girlfriend, Laura McCann is the most beautiful person I've ever met. Her warmth, massive heart and caring nature FAR outweigh the beauty you see here, but damn, she's HOT too hehe :) She's also the best model I've ever worked with. Who's the luckiest guy on earth? I am.

Here's another shot where I let the spill of the lights hit the back wall (sans black sheet)...same setup, but TOTALLY different look. I love them both :)​

For more lighting setups, check out the LIGHTING section at the top of this page :)

Posted on March 11, 2013 .

ALL THE MOUNTAINS (by Paul McSherry)

Our soon to be launched production company HEIST Films (soon!) was recently approached and asked if we would be interested in producing a music video for singer/song writer, Paul McSherry, entitled "All The Mountains". Below are some lighting setups from day one.

We didn't have a huge budget for lights so we opted to shoot tungsten. It was difficult too because we had a lot of windows that were allowing daylight to enter the premises and it wasn't the sort of place we could black the windows or really alter in any way. We also own a few LED panels that are colour temperature adjustable, but they're no match for the sun. This meant that we had to change a few shots but all in all, it worked out well :)

SHOT 1 >>

We had to change this shot from what was originally scripted because of the strong daylight source behind our actor. With no HMI's and no lights to match that sort of power we decided to shoot profile instead of font-on. To balance exposure on his face, I used a reflector and an LED set to 5600K. I had these placed high to help shape his face and add shadow under his chin. Reflectors are THE most versatile and useful lighting tool ever! And so cheap! Also, the room he was entering (to the left of frame) needed to be lit. I just set up two LED panels at 5600K, again to match the colour temp of the sun. I pointed them at the wall and bookshelf and dimmed them a few notches so as not to draw too much attention and maintain a nice contrast. Below is a diagram that will give you a clearer picture.

SHOT 2 >>

By pointing the 2K at the wall I created a soft light that spilled everywhere. I wanted our actress to look warm and soft so this was a good start. We had no scrims or really any extra rigging for diffusing so bouncing off the walls was a good compromise. ​I then had to give her face some shape. I also wanted to place some emphasis on her hair. A high, softened LED panel was placed camera left as a side/hair light and you can see it working well there. Her hair and right shoulder are glowing at least a stop hotter than her opposite side which gave her some nice shape and helped separate her from the wall. I then filled her left side (camera right) with a smaller LED. This also gave her necklace an extra kick. Notice the colour temp of this was set closer to tungsten than the back-light? I played with these because I didn't want her hair to appear TOO yellow, and wanted her skin to be more neutral. If I had all lights balanced to 3200K, it would have been a yellow mess. Splitting the colour temps also helped separate her from the tungsten lit wall. Different skin tones show up differently on camera. Don't be afraid to adjust the temperature of your lights to compensate, even in a tungsten environment. Below is a diagram that will give you a clearer picture.​

SHOT 3 >>

I lit this shot similarly to the previous shot but this time I took away the diffused wall bouncer. I wanted the man to be lit much harsher. ​I also took off any diffusion from the LED's. The streaming back light from the 2K (although subtle) was a nice way to light the archway behind him and help with a small rim behind his left ear. Once again, playing with the colour temp of my LED's to get the skin tone I wanted. Below is a diagram that will give you a clearer picture.​

I hope this helps you with your next shoot! I'm always experimenting with lighting and I learn a lot from every shoot. Although shooting in available light is a great skill to have, lighting your own environments exactly the way you want, is very rewarding. Get out there, experiment and create your own style! Thanks for visiting :)​

The lighting illustration icons used here were designed by Kevin Kertz. He was kind enough to allow me to use them to help demonstrate my setups. Thanks Kevin!​

For more lighting setups, check out the LIGHTING section at the top of this page :)

Posted on February 25, 2013 .