TEN SECONDS OF MOON SHINE (how to create a realistic moon shot in post)

Before I write anything more, I'd like to say a BIG thank you to Andrew Kramer and the guys over at Videocopilot.net. Many moons ago (hehe) I started following his work at Creative Cow and have been constantly inspired not only by his amazing tutorials but also his willingness to share with this industry. He has given so much over the years and I, like thousands of others I'm sure, really appreciate it :)

I've recently just finished shooting my third feature length film, "Only The Young Die Good", written and directed by Dominic Deacon. It's a quirky detective noir film set in the 1940's, in Melbourne, Australia. We were lucky enough to shoot in some of Melbourne's oldest buildings and had a wardrobe department that was legit all the way. It was a challenging film to shoot with a very tight schedule, a super small crew and limited light, but, I've really enjoyed it and can't wait to see it on the big screen come 2013 (picture lock is already almost done, GO DOM!!).

On the last night of pick-ups, it was a full moon. Perfect! We could grab a nice moon shot since most of the film is set in the middle of the night. So, as I walked up my driveway I decided to nick inside and grab the old 80-200mm nikkor AI lens, an even older Nikkor 2x converter and see what I could see. My biggest problem wasn't zoom range, but more-so that the sky was overcast with no detail and no stars - just a stark moon. So, after shooting a few minutes of boring video, I decided to pop off a few stills and see what I could do in post. Here's the result:

The techniques in this tutorial are nothing new, but it's good to know that we can do quick composits within EDIUS without having leave the software.  I could have spent more time on the passing clouds (like cutting out a couple to actually pass in front of the moon), added an extra layer of clouds or mist and maybe even key-framed the position of the moon to move ever so slightly.  These are all things you can try, if you've got time and want to take things to the next level. Also, one thing I didn't mention is the importance of adding grain. When you use an image from the web, or any still image, you will notice a fine grain pattern that doesn't move. This is a dead giveaway that the scene is not real-life moving footage, rather, animated stills. To help hide that fact, you can try adding a subtle layer of moving film-grain using the "overlay" blend mode to help. And finally, SOUND will really make this shot come alive.....crickets, a slight wind...who knows. I can't wait to see it intercut with the film.

Here's the in depth tutorial:

*update > I have created a project file that has everything you need to create/render out your own moon scene (found on the front page under "DOWNLOADS"). This is a new and improved scene with an extra background of clouds and a passing cloud in front of the moon. If you would like to use the scene I created, please credit me, thanks :)

Posted on December 8, 2012 .

WHAT WOULD MACGYVER DO? (the glidecam lives on!)

One thing I've come to realize is that it's important to focus on the result, rather than the tools you can't (yet) afford - especially in this industry. Recently I found an amazing location and I HAD to shoot something there. In my mind, I could see this awesome crane shot...but in my wallet I had nothing to support that vision. So, instead of accepting my crane-less situation, I followed my childhood MacGyver days and decided to try something else. What if the cheapest slider on the market could achieve a similar result?

And here it is ...

I'm not claiming to have been the first to try this, not at all. Neither am I suggesting that these shots are just as good as crane shots. I'm simply sharing a result that came from MacGyver style thinking....AND making a point that it's usually YOU who limits the outcome of a shot, not your lack of gear.  

So for the past three years or more, I've had many amazing experiences shooting films, commercials and documentaries, all over the world. It all started when I decided to try and balance my Canon 5D Mark II on the second-hand Glidecam 4000 Pro that I purchased on eBay, year 2008. Here's my reel showing what can be done with a lot of practice and an open mind.

Since RED came into my world however, I've had to change my way of thinking. Not only does shooting RAW change everything, but so does the fact that my new camera weighs at least triple what my DSLR did. Spontaneous flying with my Glidecam 4000 Pro days (no vest/no arm) are over! And those days were awesome :) That's pretty depressing, and so is the fact that if I DID want to fly with the Scarlet, it turns out that after some heavy research I'll need to buy, at a minimum, a Steadicam Zephyr to get any sort of professional results...well....that's close to $10k worth of kit....but wait!! There's got to be a way!! What would MacGyver do?

According to their website, the Glidecam 4000 Pro supports up to 8lbs of weight. When you have a battery, lens, REDMag, Monitor, matte-box, follow-focus and let's not even go there with a Samurai, you're looking at a rig that is WAY over the weight spec. But I had to try it anyway :) At first it was really just a fun joke, to see if I could actually mount this massive heavy rig onto my trusty Glidecam. Initially, it seriously was a joke. I could barely pick the thing up, let alone balance or fly it. In an attempt to balance the weight from the top and match the bottom, I had to use 6 weights either side to get it anywhere NEAR stable. But even then, it was quite clear that I needed a new Glidecam...or something the pro's recommended, a Steadicam.

For the next few days I tried several different setups. Frustration began to settle in. Nothing was working. I knew that I had to configure the rig to be as as light as possible. It was clearly far too top heavy and the weight needed to be distributed down below. So, my first inkling was to take the battery and screen from up top and place them down below....the problem was, I didn't have a long enough power cable. Or did I?

DO NOT TRY THIS (unless you really want to)

In order NOT to purchase an expensive long enough power extension cable OR an expensive belt-battery-plate from RED, you need to cut  your power adapter cord and re-wire your battery plate that you purchased from eBay ;) Below are my hand-drawn schematics that show the wires inside the power cable and what they do. Note that the tiny cables (the blue and orange ones) are for things like battery percentage and other proprietary things. You don't need to worry about them when constructing this ghetto rig, they do not have anything to do with actually powering the camera. Basically, you need to connect the Yellow and Blue wires together to form your NEGATIVE wire, and the White and Red wires together to form you POSITIVE wire. Now, on your battery plate, solder them into position according to the + and - indicators. Once that is done, you need to run the wire inside the Glidecam's pole and mount the plate on the bottom of the base plate.

But SERIOUSLY! Do not try this unless you know what you are doing, or you at least have a kick-ass grandpar who has a multimeter ;)

Re-assembling the red cable is tricky because of the metal sleeves....you'll figure it out ;)

Re-assembling the red cable is tricky because of the metal sleeves....you'll figure it out ;)

INVESTMENT

My awesome pop, Jacques Poldermans, ready to reflect like a boss.

My awesome pop, Jacques Poldermans, ready to reflect like a boss.

THE SETUP

You'll need to drill holes into the pole at the top and bottom, my good bro Trav did this for me :) Once I had the wires run, I managed to balanced my rig with a wireless follow focus and lightweight matte-box as you can see below.

IMG_3237.JPG
IMG_3233.JPG
IMG_3235.JPG

It's far from perfect, but it's also far from $10K. "Real", "Professional" Steadicamers will scoff at my rig (and already have), but I doubt they'd scoff at my results if I said it was shot with the latest Ultra2c. There's a lot of name dropping, brand bias bullshit out there, and then there's people who get the job done. When I can justify the purchase of something more high end, I will...and that goes for all of my equipment too. But in the mean time, I sure as hell will try my best to get the shot I want, for as little money as possible. Besides, it's super fun trying and you learn a lot.

IMG_3228.JPG

LATEST RESULTS (I shot this test video without a matte-box and without a follow-focus. This alowed me to add extra weight to the top, in this case, the Atomos Samurai).

Besides this test, I recently shot a few scenes for a short film with this a similar setup. The shot below required 6-stop HDRX to compensate for the exposure shift from full daylight outside, to low light inside.

ULTRA HEAVY

So can you fly this rig without an arm/vest? Sure, and I did for a few shots in a recent shoot, but if you're thinking slow smooth long takes, you're dreaming. I can fly the rig just with my arm for about 10 seconds...but it's more of battle than anything. One thing I've noticed however, is that when actually using the X-10 arm/vest, I find a heavier balance flies better. Obviously there is a limit (I went way too far with 2 batteries down below and some heavy gear up top) but, I've found that a heavier rig balances better. Below is a pic of a setup that was nicely balanced but was too heavy for the rig - the result was micro vibrations in the footage, no matter how carefully I walked.

IMG_2967.PNG

So, is this the new combo? It's definitely more difficult to set up, but maybe it is, we'll see :) Just like I had to practice for days on end with my 5DII setup, it's now time to get some hours in with the RED :)

Also, I'd just like to say a BIG thanks to Robert Bonici for always being up for camera tests and adventures...you're a legend Ryob!! Thanks :)

Look how free I am hehe ;)

Look how free I am hehe ;)

Posted on December 6, 2012 .

STARVING ARTIST NEEDS A BALANCED DIET (making art and money)

It's one thing to focus on your on-line presence, your business skills and your industry status - but it's equally important to remember what drives you as an artist. We live in a world where money is most certainly a driving force, in a world that is focused heavily on financial success and freedom. It's funny because we are given advice from the greats that suggest we "follow our dreams" and stay true to our hearts. Funny, because it sounds great, but how do we pay the bills if our dream is to be a painter, a photographer or a musician? Unless you're an overnight success (Gangnam Style), I'm betting that you'll need to work in a field that doesn't really match your dream, or in a job that bores you to death. This is a part of life right? We know that money shouldn't be what drives us, but more often than not it is what gets us up in the mornings.

Mid 2007 I made some serious, drastic changes to my life. One of them was to quit a secure job with excellent pay. Another was sell my house and my dream car...and finally, decide that I had to give this "living the dream" thing a fair go. So I sat down and thought about what that dream could be. I've always loved photography, film and images. These art forms have constantly made me happy throughout my life....and continue to do so. Problem is, how the heck was I going to survive as an artist!!?? Balance. That pesky word that solves everything. So simple.....so annoying! So for the fist few years I was driven by this amazing feeling of artistic, soul aligning enthusiasm. I couldn't care less that I was broke and didn't have money for nice clothes or premium unleaded to fill up the Version 6 WRX STi that I didn't have anymore. I was so utterly happy to be following my dream and developing my style as a cinematographer - there was no balance. There was no money hehe :) So, it was time to think like a business man. Time to give this money making thing a go. Once again, for the next couple of years, I tipped the scales and focused all of my energy into my business. My art suffered....and as a result, so did I! I was so focused on building a successful name and business for myself, that I never had time to shoot! It began to depress me. So then came 2010. I was sitting there scratching my head, asking myself "how can I do both?", "how can I live the dream as an artist AND be financially successful!?". Did you know that asking "how" is a billion times more powerful than asking "why?". If I asked myself "why can't you live the dream as an artist AND be financially successful?" I assure you my clever brain would have responded with something like "because you don't have enough time to do both" or "because in this day and age, you can't do both unless you're mates with George Lucas". So, I don't want to start sounding like Tony Robbins here, but the day I explored the answers to my "how", I began to create a balance.

 The inspiration to write about this came to me when I stumbled across this business card in the back of my fake Gucci wallet.

 It was given to me by a guy named Seb at a short film night called Shed Cinema - run by Matt Cleaves and George Clipp. When I asked for his card, he said "sure, pick which one you like best :)". As you can see, Seb is a super talented artist. Each card was hand drawn and completely different....I was amazed. I always wanted to be a ninja as a kid (my other dream hehe) so this card was an easy choice.

Looking at it again, I was inspired and reminded about what drives me as an artist and how awesome it is to get lost in that creative place....how awesome it is to follow that dream and how good it feels to actually CREATE and share art. No wonder I forgot about money.....but now my focus is on balance. How can I be a pure and passionate artist, AND earn a very good living as a result? My brain is already giving me some fine suggestions ;)

 Master your craft, listen to what makes you happy as an artist...but dot forget to eat.

 Check out Seb's website www.sebfowler.com. We can't wait to get him to story-board our next shoot! If you get the chance to meet him in person, I dare you to ask him for his business card :)

Posted on November 1, 2012 .

THERE IS AN "I" IN TEAM!! (don't work alone)

As you're making your way up the ranks to world class cinematographer (aim for the top I say!) chances are you've become used to doing things yourself. Taking on additional roles as the director, producer, editor, colorist and even sound recordist is not uncommon. Whether that's because you're a power freak (the old me) or it's simply a budget constraint, these are tasks we've had to juggle in order to get the job done, even though our main focus is to be behind the camera. My personal journey over the past 10 years has allowed me to gain many skills in both pre and post production, however, I'm really starting to see the value in team work and understanding the importance of skill set delegation. "Let's work as a team" is the cliche advice we all know, but lately what I'm loving more and more is the experience of a crew that clicks. I remember when I was younger I used to look at the credits of a Hollywood feature and shake my head at how many people were actually involved. Even up to a few years ago, I would revel in the egotistical confidence that I could direct, shoot, edit and colour my own productions! I think part of that mindset came from the idea that I knew I could trust myself....because trusting other people with your vision is scary right? And that's the point of this blog entry.

I was recently asked to shoot some stylized video for a boutique bakery commercial in Melbourne. Sounds amazing right? Well, you would think so too if you got to see what had gone into pre production. The way Tatjana Green (creative director) described it over the phone was enough to make me feel fine about the fact that she was taking advantage of my 50% off RED shoot rates during July ;) And I hadn't even seen the brief yet! What came through to my inbox a few minutes later was a super well planned, cleverly thought out creative masterpiece just waiting to be captured. As I was reading through the shot list and looking at the treatment, something dawned upon me. She TRUSTS me to make these visuals happen, and that was a wonderful feeling. As I begin to shoot higher budget productions, I notice more and more how crew members are carefully selected, roles are clearly defined and responsibility is taken more seriously. No wonder it's tough to get into this industry...because not only is there a lot to prove with your show reel, but you've got to perform on set...and to top it off, every job you get is like an interview, or a review.

So, have you got confidence in your own abilities, and what about the crew you're working with? When I speak at seminars or run workshops, I try to stress the importance of self confidence as a cinematographer. Are you confident that you can bring a directors vision to life? (within budget of course!). I'll often ask my class "what gives you confidence?" and the usual answers are, experience and knowledge. For me, this is true! The more I shoot, the more challenges I encounter and the more I learn about different lighting situations. The more I study about cameras, codecs, colour spaces and compression (c,c,c,c,c,c,come on!), the better equipped I am to chose the right tools for the right job. Being confident as a cinematographer is a great place to start, and this is where the "I" in team comes into play. I honestly believe that every person has creative depths that are off the chart, but the one thing that holds that original and fresh creativity back is confidence. You may or may not have seen the promo I made for a recent seminar I spoke at (www.exposeddownunder.com.au) where I talk about the importance of technical knowledge and how that can empower your creative eye. Once we begin working in harmony with that part of our brain, we start shooting with a truly unique style. Awesome! The "I know what I'm doing" has begun....but now you have something else to look at. Your team.

When I realized Tatjana trusted that I could bring her vision to the screen, it gave me a different kind of confidence. It came with pressure! But if you've read my blog before, you'll know that for me, I like to think that "Pressure makes diamonds" :) My point here is, that I've been trusted by a team member, a crew member, and as I studied the brief, I in turn trusted her! The TEAM was formed and as a result, we could both focus on our jobs as professionals. We were both subconsciously encouraging each other as creatives to get the job done as planned...and what a success it was.

I'm writing home about the importance of team work because I've realized it's a massive prerequisite to forwarding your career as a cinematographer. Being multi skilled in this industry is a massive plus. A DoP who is also an editor and colorist has a serious arsenal of skills at his/her disposal when assessing a shot. A soundy who knows lenses is going to know about framing and where not to place his/her mic. An editor who knows directing is going to see better performances and choose shots that help the story, and the list goes on.

When I walked onto set that day to start setting up, I had a new type of confidence. It was so nice NOT to have to come up with shot ideas like I normally would on less organized shoots. It was nice to KNOW what lights I needed, and where to place them before I even got to the studio. It was awesome to know how the shoot was going to be treated in post when I was setting up the picture profile in camera. So many things had been taken care of by someone else which left me in a position where I could REALLY focus on my job, and focus with sharp clarity.

There's an "I" in team, and that "I" is you. But let's not forget how important the team really is. Don't be afraid to let someone else do their job because that's the beauty of this industry. We are all working together and have all been chosen for a reason. When I walk on set with a new crew, I trust that each and every one of them are just as passionate and willing to do their best as I am. That stuff is infectious. Try it!

A big thanks to Dean and Rochelle from Preface Films and Tatjana Green from Brought To You By for the opportunity to shoot such cool and fun stuff. Also thanks to the amazing Karen from Finessence Photography for these great BTS shots :) GO TEAM!!!

Posted on July 15, 2012 .

DESTRUCTIVE CREATION (broken glass filters and more)

So it's not like this hasn't been done before, but it was a first time for me. Deliberately distorting an image before it is captured is an art form...and I'm learning that the fun way :) We've all used ND filters or at least a UV filter right? Maybe even a polariser or a grad? The point being that the idea of placing something in front of your glass to enhance or change your recorded image is an idea that has been around for a long time. But let's dig deeper into that theory. You are preconceiving what you want to capture, and you have ideas about how you want your final image to look, before you are anywhere near your camera....now that's one powerful way to create. I mentioned that I'm doing this the fun way...and by that, I meant that it's fun to experiment. I knew that I wanted a warm and rich look for these shots, but I also wanted flairs and some distortion, maybe some uneven blurriness and who knows....lets just see what we get. With all experimentation, I generally at least have an idea of what will work and what wont, but I'm never sure...and with this shoot, I was more than happy with the results.

 The unnerving thing about shooting with a RED camera is that you really have to trust your intentions with the RAW data and what is actually displayed on the monitor. The richness of colour and wonderful contrast you see in the image above is nothing close to what I was seeing on the back of the 5" RED Touch LCD. But...I knew that it was hidden in there somewhere.

What I wasn't completely prepared for was the beautiful red cast that came from the ND's that I purchased on Ebay! (great service, fast postage, thanks fotocola). I knew I was purchasing a cheaper variety and also knew from some research that usually, cheaper ND's have a color cast - something that usually is a bad thing. But for this experiment, I was pleasantly surprised and loved the result. One obvious thing that comes from experimenting is the result, but the other bonus is knowledge. Putting something into practice that you may have only read about really does solidify your understanding. That being said, I could confidently shoot with these cheaper ND's knowing that I have a jump in the red channel to deal with. Not ideal, but that knowledge just saved me about $200 per ND filter!

Remember in my last blog post I was talking about how fun it is to play with RAW data? Well, I've attached a frame from this shoot for you to play with so you can experience the fun all for your self! Check the "downloads" section above to find the file. You'll also need RedCine-X PRO, a free program created by RED that allows you to edit, transcode and play with R3D files (native files recorded from a RED camera). It's almost a color correction suite....for free! Obviously it's missing the high end features of a real color application like DaVinci Resolve Lite (also free) but it's the perfect place for you to check your clips, resize and re-frame and finally, adjust the color to your liking. I've prepared a quick tutorial below which will help you get started.

REDCINE-X PRO TUTORIAL

So, back to the destruction ;) The idea was to create some home-made filters that would slide in front of the lens and create some organic (that word is SO overused these days) distortion and flairs. My dad is a gun. He's always willing to help me create ghetto shoulder rigs or anything I need for my shoots....and this time he delivered above par. I was like "dad, I need a couple of pieces of glass, 100x100mm, 2mm thick.....can you help me?" And within 24 hours I had 8 pieces ready to go! They fit perfectly into my matte box and I was excited to get destructive. I tried a few things....literally smashing a whole into the glass, scratching it with stones, sandpaper and gravel, and even sticking some laminate over parts of the glass. I really only tried two of the six pieces so I'm keen to get out there see what else they have to offer. The other cool thing is you can rotate them to get variation in the effect. The best thing above all is that your filter will be different to anyone else's filter, no matter what! I love this shit :)

So, if you're still reading...thanks! I'll hopefully get better at writing and am thinking of hiring someone to proof read what I do. I have lots of adventures and knowledge to share and am looking forward to doing bigger and better things both as a cinematographer and a blogger :)

 I couldn't have shot this without the help from my Producer Joel Buncle, camera assist Nick Hancock and our lovely model, Tiffany Riddell.

PRESSURE MAKES DIAMONDS (my introduction to RED digital cinema)

RED_logo2_600.jpg

If you're reading this, you'll most likely recognise the logo above and I'm betting that along with your recognition comes a strong opinion about the company it stands for. There's no doubt that RED have made an impact on the film industry, both at the Hollywood end of cinema and now more recently (with the release of the Scarlet-X) the Independent film industry. Ridley Scott's Promethius - shot on RED. Peter Jackson's The Hobit is being shot on RED (48 RED camera's to be precise) and to name a few more, how about Contagion, Girl With The Dragon Tattoo, The Social Network and Pirates of the Caribbean? All shot with RED cameras. So that gives them some high end clout, but at $50k for a working camera, you'd expect something pretty impressive...and then came along the RED Scarlet-X...a $17,500.00 camera that is ready and capable of shooting 4K cinema images.

I had been following RED for a few years, actually, since they released their first camera back in 2006 - The RED ONE. But until now, nothing RED really jumped out at me as something I was willing to own and operate. A couple of months ago however, that all changed :) On November 5th of 2011, I placed an order for my very own RED camera, the newly announced RED Scarlet-X. Now, you may have noticed some time discrepancy between my last two sentences....that's because it took over 4 months to actually receive my camera! And that's one thing I'll get into later...just "be patient" hehe....omg.

So enough about my story, what about the camera? Coming from the land of DSLR (a great land, don't get me wrong) this thing is a completely different beast.

[ FORM FACTOR ]

When comparing this camera to your trusty 5D Mark II, the one thing you'll notice right away is the weight and size of the "brain", or body. It's heavy (about 2.5kg). And this is the camera without anything attached to it. Hold on....so what do I mean attached? Well you see RED's philosophy is "Obsolescence obsolete", which is a fancy way of saying that once you buy a RED camera, you can upgrade parts of it as technology changes. It's a modular system. So that means that EVERYTHING, and I mean pretty much everything can be changed or taken off of the brain - Like the sensor, SSD module, lens mount, monitor and battery plate. This is pretty awesome because it means you don't have to keep selling your camera when a new one comes out...and if you look at today's market, there's almost a new camera being released every couple of months!

So back to the weight.....now once I start adding pieces to my brain like a monitor, battery plate, battery, lens and media, the thing is pushing 6kg!! If you're used to shooting DSLR, that's heavy. So yeah it's cool that I can re-live my leggo days and build my camera the way I want it, but holly heck the weight alone changes everything. Take your tripod for instance...chances are it don't cut it no more, and let's not even mention THE GLIDECAM!!! Cos I might just tear up.

scarlet_setup.JPG

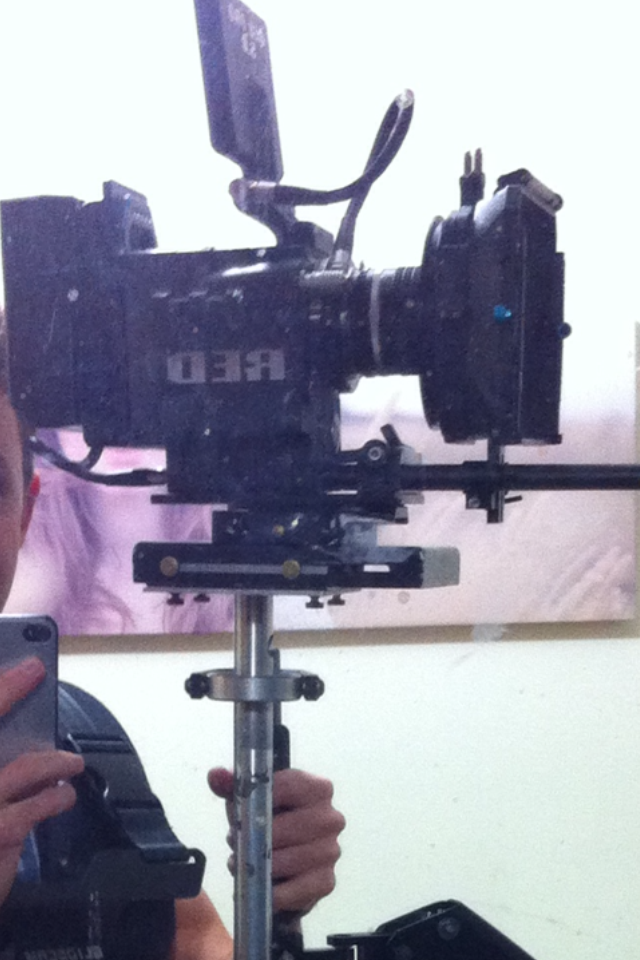
In short, the thing is a tank and when you kit it up, it looks like it's ready for war.

[ IMAGE QUALITY ]

Image quality isn't all about resolution right? That's true. Let's not forget dynamic range, colour rendition and weather or not the image is compressed at capture. Back to resolution....just have a look at these numbers for a sec...

DSLR: just over 2 megapixles

RED Scarlet-X: almost 9 megapixels

That's 4 times the size of bluray. Imagine looking at the biggest LCD TV on display at JB-HI FI, and multiplying that by 4. That's the sort of resolution this thing captures. The detail is incredible. Below is quick example of how much detail there really is at 100%. Click on the image below to view it at it's original size (make sure once the image pops up, that you click again to see it fully enlarged at 4K).

[ the soldier above, Tristan Coates was a pleasure to work with during pre-production of an up and coming Australian feature film ]

Resolution and detail are something that you once thought you had with your DSLR...but trust me (ESPECIALLY if you came from a Sony Z1...ahem...), after working with 4k images from your RED, you realize how soft and hideous the DSLR's are when it comes to actual resolution.

I can hear you saying "when will I ever use 4K?" or "We only just started shooting 1080P!!", but here's the thing. If I could shoot at 3K, 4K or even 6K, I would! (RED just announced a sensor upgrade hehe)...why? Even though I've only once delivered a film at anything above 1080p anyway? Even though most of my stuff is for web and bluray? The simple fact is, capturing at higher-than-intended-delivery resolution gives you the crispiest of CRISP images when you downscale it to 1080p AND it gives you the flexibility to stabilize and re-frame your shots, just like above. The advantages of 4K resolution are massive, literally so!

[ RAW CODEC ]

Resolution aside, let's not forget one of the single most important reasons I chose RED. The fact that it shoots RAW. RED records it's 4k images directly to a proprietary "raw" codec which holds 16-bits of information at approximately 43MB/second of footage (4096x2160 at 6:1 compression). That's about ten times more information than a DSLR records, and it's not hideously compressed and ruined by an internal codec, nor is it crippled by miore or aliasing. I'll stop bashing DSLR's in a minute....but it really needs to be stated the ridiculous amount of detail that lives inside one of these RAW files. And let's not forget about colour! Go back to that 16-bit number again. A DSLR shoots 8-bit 4:2:0. The Scarlet shoots 16-bit RAW (which when converted is equivalent to 4:4:4) The difference between those numbers on paper may not seem like much, but in reality, they are galaxies apart - this is what makes the world of colour grading/colour correction so much more flexible and fun....but the fun doesn't stop there!

Shooting RAW means you have access to things like White Balance and ISO AFTER the fact. That's right, you can download your footage from the day and play with the white balance until your heart is content, as if that's the way you shot it originally! And, if you shot too hot (like I did in the first clip at 800 ISO), you simply bring it back to 320 ISO and WHAMMO, your highlights are saved. The power of RAW was previously only available to photographers, but now, thanks to RED, cinematographers can play too :)

[ REAL COST ]

So what's stopping you? Sell your car and buy a Scarlet!.......no wait......hold on a second.....

If you look at a Scarlet package at the RED store, you'll see a price tag of $17,500USD. This gives you enough kit to start shooting and then play with some crispy 4k imagery. But....the two RedVolts (batteries) that are included are drained within 25 minutes a pop. The media supplied (1 x 64GB SSD) will capture 22 minutes of footage at 4K in the highest quality. And well, yeah. Nuff said? RED gear isn't cheap and to think you'll be up and running after a $17.5k investment is not wise. Let's not even talk about how you will lug the thing around. Custom case anyone?

[ MAKING IT WORK ]

So batteries were a big problem for me, in fact, I ordered 4 RedVolts and 2 x chargers PLUS a Side Handel because without the Side handle, there is nowhere to put the batteries!! Are you thinking what I'm thinking? US$1,950 (plus shipping and import tax) for a power solution that lasts not even two hours? ummm okay, there's GOT to be a better option. And thankfully there is. I sold my Side Handel, batteries and charger and decided to go with.....

V-LOCK batteries have been around forever. They are bulky and heavy, but they last. For instance, a 190WH battery will power a Scarlet for about 3 hours, some times more depending on the climate, plus, you can power other accessories like a monitor or light with the same battery using what's called "p-tap". The problem is, how the heck do you connect one of these motha's to your camera? Well, that's where it gets stupid expensive again. You need a battery plate and this brings the powering solution back to a ridiculous price again. Thankfully however, there are plenty of third party manufactures out there that can help. I purchased this battery plate from Cinema Oxide and it works fine :) But be careful...remember I said you get to re-live your leggo days? Well, to connect the battery plate to the camera, you need a camera back plate that connects the battery plate.....that connects to the camera.

So finally I found someone locally who had some V-Mount batteries in stock at a great price. Check out www.protog.com.au - those guys are super helpful and friendly and have a lot of cool stuff (I'll be doing a review on some of their products later this year).

Now I can take my camera out into the wilderness and strap it onto cars and play! But it required a massive amount of research and risk to get it there, especially when at the time, nothing was in stock because everyone was trying to do the same thing. Now, while you're trying to get a cost effective package together, I bet you're thinking about media. 1 x 64GB SSD RedMag costs US$950. Remember that only records 20ish minutes of 4k footage. So what about third party media? No deal. Which leads me to...

The Samurai is an amazing piece of kit. Not only is it a framing monitor, but it also records 1920x1080p 10-bit ProRes 4:2:2 video, straight to a standard 2.5" hard disk. And let me tell you, the quality of these files is simply stunning. In fact, I need to test it some more, but I'm finding I get sharper 1080p images from the Samurai than I would if I transcoded directly from the RAW 4K file in post! It's such a luxury to know that you have a backup of what you're shooting, but also that you have files that are colour friendly (4:2:2 10bit), edit friendly (ProRes) and ready for web/bluray delivery! (1080p). This saves SO much time and processing, but, you know what I like about it most? I like to think that the Samurai turns my RED Scarlet into an Arri Alexa hehe ;) I literally come back to the studio after a shoot and can start editing directly from the HDD I was recording to. I don't even have to wait for files to transfer. It's a genius device and as far as I'm concerned, it's a must for any RED owner, especially those that are worried about 4K processing. Which brings me to....

[ WORKFLOW ]

Working with 4K RAW (10 x data-rate of DSLR files) is a scary thought. Storage space is one thing, but what about editing and working with 4K? Well, as scary as it sounds, it's actually not bad at all. The RED codec has the ability to preview in low quality, so for example you can edit at 1/16th resolution and then grade my shot in full res at the flick of a switch. This works fine for me, and to know that I can stay 4K the whole way through and potentially release my own cinema DCPs is pretty amazing. I work with an i7 laptop and E-Sata drives. Nothing special at all. Software like EDIUS, Premiere Pro, Vegas, After Effects and DaVinci Resolve all work natively with RED's codec. That means no transcoding, just drop your clips onto your timeline and away you go. There are ways to speed things up and edit at full res, but that's when money say hello again....check out the Red Rocket, or browse through this thread at reduser and you'll see what I mean.

For now, I'm happy with my ProRes files from the Samurai. They are more beautiful than anything I have ever seen from any camera first hand. Unless I need to access the RAW info and correct white balance or exposure, or if I have a shot that needs stabilization, the 10bit ProRes files from the Samurai are something you need to see to believe. But of course, I have the option to chose 4K or 1080p, and that's a great option to have!

Finally, remember when I said 4K is four times the resolution of 1080p? I wasn't joking...and that means you can re-frame in post and essentially create a wide and a closeup with the same shot, without losing resolution! Pretty cool stuff right? So don't be afraid of massive resolution, it's your friend :)

[ CONCLUSION ]

The road to RED was a rocky one. At times it was a frustrating transition, but it is one that has pushed me to learn more and more and question my choices as an artist and a camera technician (now days you got to be). If you're thinking about getting yourself a RED, no doubt you'll be nervous. This camera is the opposite of cheap (compared to Prosumer/DSLR land cameras) and it comes with a lot of responsibility. But if you're like me, and demand the absolute BEST image quality and flexibility, then there are no other options. RED really is leading the industry and I'm very grateful to be able to create art with a camera as amazing as this one.

There are no excuses now...I can only blame myself if my work doesn't shine, but I love pressure...because pressure makes diamonds.

Posted on May 8, 2012 .

EDU EXCITEMENT!! (film-making seminars in australia)

I went a bit hippy with this promo....but hey, I was born in India and blessed by the Dalai Lama himself, true! Anyway, my goal is to show people the link between technical understanding and creative freedom. When we learn the reasons of why we do things, and then how things work, it allows us to create without limits. It's not about gear and money, it's the old saying that knowledge is power....and this is very true when it comes to film making.

It was fun looking back at the archives and remembering how much fun I've had shooting and learning.....this industry is awesome! Can't wait to meet lots of new people at EDU this year :)

For more information about the workshop and other presenters, check out exposeddownunder.com.au

Posted on May 8, 2012 .